Showing posts with label Armored Warfare. Show all posts

Sunday, January 30, 2011

Air Assault Task Force - Mini Thunder Run

The game: Air Assault Task Force
The scenario: a US Cavalry company reinforced with engineer assets is pushing into Baghdad and trying to spoil an ongoing Iraqi Army withdrawal.
What I want to share: fire and maneuver while on the run with a platoon of M1A2 Abrams tanks.

Click the image for an expanded view. The graphics are a bit dated (this scenario is quite old), but you have to give it to me that ProSimCo games rock when it comes to immersive military command decision making. The white slashed areas are urban terrain of different densities. Our axis of attack (Warrior) is a nightmare: obstacles (not depicted since I don't know where they are) and AT missile ambushes along the roads (white lines) leading to the bridge south of objective Fox.
Click the image for a better view. Black grids on the map are squares of 1 km.  Our order of battle is shown in the right pane of the user interface. I'm going to advance towards phase line Falaise with the First Platoon (4 M1A2 Abrams) up front and the Second Platoon (4 M2A2 Bradleys) in a follow and assume posture/mission. I'm going to avoid the main road on axis Warrior because it is likely that the AT missiles are aimed directly to them. The edge of the urban terrain south-west of the main road is particularly good for AT positions and I plan to clean it up with the tank platoon.

I know, I know ... urban terrain and tanks do not mix well. But I'm claiming extreme time constrains. An infantry platoon with a "clear" order would take no less than two hours to clear that amount of terrain.

Click the image for an expanded view. First Platoon is in the center of the map, just a few hundred meters before entering the hot zone. The First Platoon will move northeast but keeping itself southwest of the axis Warrior. Selecting a "staggered column" formation for this platoon would result in each individual tank too separated from each other and this would generate mutual support issues.
Click the image for an expanded view. To make sure each tank can support by fire the rest of the platoon I select "none" as the formation and drag the tanks very close to each other.
Click the image for an expanded view. The First Platoon is selected (note the green squares/outlines on each icon in the map) and ready to move (the little green arrows are the waypoints for the Platoon). Most important: the "suppress" order (blue cross with a surrounding green circle): whatever hostile unit is detected within that circle will be fired upon by the tanks. 
Suppression is the name of this game, folks!

Click the image for an expanded view. We made contact right away. The range is close and murderous. In the screen above, the Platoon fires and suppress the enemy position. Note the "S" marker, for suppressed. 
Click the image for an expanded view. I had to move the Platoon really close to identify the enemy position. Now with the unit identified, I can issue a "TRP" order to the platoon so they use their fires to destroy the enemy unit. This AT-5 team, if un-suppressed, would kick our asses from 3 kilometers away. So watch it.

The first AT-5 team is destroyed and I move my units right away. Very important: re-issue a "suppress" order in front of the First Platoon, so they fire away against any hostiles they find on their way.

Click the image for a better view. We are moving and kicking butt. The red "X"s are enemy AT-5 positions destroyed. In the screen shot above, the First Platoon has just encountered another one and I'm issuing a TRP order. It's quite a pleasure to hear the sound of the main guns blasting the enemy position at point blank range.

Click the image for an expanded view. The First Platoon (red and white flag with a number 1) has cleared 3 km worth of AT ambushes (7 of them, marked as red "X"s in the map) and stops short of phase line Falaise. Unfortunately, we lost a tank right at the end (blue "X" in the map) of the run. 
Cheers,

Sunday, August 29, 2010

Don't Take Your Tank to No-Tank-Country

I just bought the V2.538 upgrade for Steel Beasts ProPE (link opens a pdf with the release notes).

There new AI-controlled tanks and vehicles plus improvements to the engine. The new map objects that you can add within the editor sound great. Yet I hadn't try any of those yet. Hell, I have a lot of to-play scenarios yet!

Just to prove how rusty I am after the summer hiatus, the screenshot below shows me in the middle of a hopeless tanker blunder. I was trying to infiltrate (LOL, how do you infiltrate a 60+ ton behemot like the Abrams tank?) through a patch of woods and I was caught by enemy tanks who diligently dispatched me ... from the comfort of their prepared position located 3 Km away.

 When there is very little room to maneuver out of trouble ... who is the first crew member to get killed? The driver!

Cheers,

Sunday, July 18, 2010

Gefechtsaufklarung - German Reconnaissance Units in Achtung Panzer Kharkov 43

I regard reconnaissance units as military elite. In WWII they went ahead of everybody, in nimble vehicles, armed with just a stick and skill ...  looking for trouble.

In Achtung Panzer Kharkov 1943 (APK43), reconnaissance units are important assets during the 2D turn-based phase. They will spot enemy units at a larger range than other regular units. The moves and spotting done by reconnaissance units during the 2D turn based phase are the last throws of what the Germans called tactical reconnaissance (link opens a pdf written by me and stored at Matrix Games). Any type of reconnaissance done during the 3D phase would have been called "battle reconnaissance" by WWII German doctrine .Battle reconnaissance came in different flavors and sizes, being more of communal endeavor of line and reconnaissance troops. With a wise mixture of armored car patrols, 4 men battle patrols and squad-sized combat patrols, the objective was to gain detailed information in order to plan the battle accordingly.


It all depends on your commanding skills!


"While scouting a woods, a favorite German ruse is to drive the leading car toward its edge, halt briefly to observe, and then drive off rapidly, hoping to draw fire that will disclose the enemy positions." Quote from this book.


Fight the good fight, but bug out if the odds are against you.


By the way, why is this guy's wingman not providing mutual support?


Don't be shy and mix your platoons!

Cheers,

Thursday, May 13, 2010

Steel Fury Kharkov 42

Installed and briefly messed around with it. I definitively like it. The manual was slightly better than in the demo. There is a lot to learn yet.


It does look great!

Cheers,

Monday, March 1, 2010

Achtung Panzer Kharkov 1943: German Half Tracks are APCs, IFVs or both?


Damn it! For the whole weekend I couldn't keep my computer's cursor off the shortcut of this fantastic new war game. When it rains, it pours.

Several 3-D battles in Achtung Panzer Kharkov 1943 (APK43) got me commanding a lone German Panzergrenadier (Panzergrenadiere, PzrGren) platoon against (luckily, so far) Russian infantry. The PzGren  were a specialized branch of infantry specially trained and equipped for combined arms operations along with tanks. According to WWII German Army war fighting philosophy, the PzGren's were to be employed keeping the mission and objectives of the tanks in mind. It was the PzGren's supporting the tanks and not the tanks supporting the PzGren's. It is a subtle difference that's hard to keep in mind when dealing with the nitty-gritty of the tactical challenges in the game, but at least let's know why we are putting these PzGren's in harms way.


The staple of the PzGren formations are the widely popular half tracks. Each half track could transport a whole German PzGren squad. Were half tracks used as armored personnel carriers (APC), or infantry fighting vehicles (IFV)?

Saturday, January 23, 2010

Tank-Infantry Teams in ARMA2: Basic Concepts

"We have gotten into the fashion of talking of cavalry tactics, artillery tactics, and infantry tactics. This distinction is nothing but a mere abstraction. There is but one art, and that is the tactics of the combined arms."
Major Gerald Gilbert, The Evolution of Tactics (London, 1907)


Every combat arm has strengths and weaknesses. Since ancient times, commanders have used different combat arms in concert to maximize the survival and combat effectiveness of the others. In the modern battlefield, some form of combined arms is required even for survival.

The strengths of tanks are well known: great firepower, great mobility and great armor protection. One of the weaknesses of the buttoned up tank is a limited field of view. This weakness becomes serious  in terrain where the field of view is obstructed by closely located vegetation or buildings. In these cases, tanks can rely on infantry teams to see and hear what the tank crew can't. In turn, infantry gets the benefit of increased firepower.

This blog entry series is centered around USMC infantry and how it feels to cooperate with tanks in ARMA 2. This is not about tank tactics (ARMA 2 is not an armor simulation) but rather what infantry does in cooperation with tanks.

On the use of tank-infantry teams in the USMC, it is kinda curious that doctrine manuals suggest that tanks are never integrated with infantry units smaller than a company. However:

  1. If the situation demands, a tank platoon (or a tank section) can be assigned to an infantry company. This is called tanks in direct support (DS).
  2. Tanks in DS of an infantry company are now subordinated to the company commander, who in turn may assign the tanks to an individual infantry platoon. The reinforced infantry platoon commander may make some interesting combinations (more of that in a future post)
  3. The minimum amount of tanks assigned to a platoon is a section of two tanks. This minimum is respected religiously. Tankers will refuse to fight without a wingman. :)
  4.  About bullet point #1, if the situation demands, generally a combination of close terrain and a serious  AT threat. See the screenshots below.

This is tank country. Leave the tanks alone to do what they do best.


Now we are talking. These Marines are pulling all around security for the tank. The Marine in the foreground is covering the dead space above the tank.


These woods offer the enemy lots of options for an AT ambush.


Peeking around corners, something tanks can't do very well.


Cheers,


Wednesday, January 20, 2010

Faulty observation plans work best when combined with faulty direct fire plans


My topographic map reading skills suck ...

The game: Battle Group Commander: Episode One (ProSim)
The mission: counter-recon, do not let enemy reconnaissance units to reach FOB Jack. I will not go into the OPORD included in the scenario (not too much space to post), but my guess is that this is basically a "guard" mission.

Just so you understand how I am fighting this battle, my plan follows ...

Tuesday, January 19, 2010

Steel Beasts: I Would Love to Stay and Fight You, But I'm in a Rush!


This scenario by Gary Owen is an exercise to practice platoon movement techniques. I'm in command of a platoon of M1 tanks and I have to take an objective some 10+ km northwest of my position.

Time allowed is 90 minutes and the terrain ahead is ...

Tuesday, October 6, 2009

Steel Beasts ProPE Resources: Gary Owen's 1st Volunteer US Cavalry

Steel Beasts ProPE (SBProPE) is the home version of an armored warfare simulation used by several armies around the world. Although the civilians like me can jump on a virtual tank and blow stuff up in a jiffy, it is always more enjoyable to play an SBProPE scenario using real life tactics. Real life tactics, as much as you read about them in field manuals available elsewhere, are not easy to put into action. The experience can be overwhelming because, as in any other military-grade simulation, the virtual battlefield in SBProPE is brutal and unforgiving.

Fortunately, the SBProPE fans community includes many soldiers and tankers from around the world who are more than willing to help. These guys take this hobby to the next level. Some of these fine men are just outstanding. One of them is a gentleman that goes by the (nick?)name of Gary Owen, a former US Cavalry Trooper who owns the 1st US Volunteer Cavalry (1stVUSCav) website.

There are many reasons why I keep coming back to Gary Owen's (GO) website. Just to mention a few: the choice of topics, GO's extraordinary ability to point out what's critical in those topics and GO's easy to understand, didactic writing style. The 1stVUSCav website also has a whole section about Soviet/Warsaw Pact forces organization and tactics.

A short time ago, I had the honor of GO commenting on one of this blog's entries. I can only hope that in future he will continue to do so.

Cheers,

Saturday, October 3, 2009

"Warrior's Rage: The Great Tank Battle of 73 Easting" Trickling into Bookstores

This book is trickling down to the shelves of the biggest bookstores in the Washington DC area. It was about time (it was available at Amazon since the beginning of September)!

I got my copy this morning and browsed it briefly. From what I could read, it looks like a great tactical analysis of the battle, with frequent references to the operational situation. Right at the introduction the author bashes the US Army top brass quite a lot.

I thought the book was going to be a bit more thick. This is a picture of the book on my desk.

Looks like a great read for fans of Steel Beasts ProPE.

More details later.

Cheers,

Monday, September 7, 2009

Advancing Through Hilly Terrain (Tank Tactics)

This entry is a continuation from a previous one that dealt with some of the problems of cresting hills while moving to contact or conducting reconnaissance. In that previous blog entry, an M3 Bradley CFV/M1 Abrams MBT hunter/killer team was moving north and had a hill between them and enemy-held terrain. I'm using Steel Beasts ProPE for this write up.

If cresting hills is not a good idea, what is one to do then?

As one of the faithful readers of this blog (thank you Alan for visiting!) commented in the previous entry, the key is moving like the flow of water. Move around hills, not through them. There are many variations of how to do this and I'm going to write only about the one I'm most familiar with.

Please see a graphical representation in the next figure.
  • Of all the members of the hunter/killer team, I've chosen the main battle tank to move and watch ahead. It's always better to make contact with the enemy with the most survivable platform. You may be wondering where all the buzz about the M3 CFVs acting as hunters went, but remember that this situation the hunter/killer team has a moderately small area to cover and is moving ahead as a team instead of separating themselves into different roles
  • Below the hill, the tank moves following a contour line of the hill, preferably the lowest one. In the figure below the movement path of the tank is represented by the big blue arrow. The small blue arrows fanning out the big blue arrow represent the orientation of the turret.
  • The two M3 CFVs provide over watch while the tank moves. They cover the terrain in front of the tank's axis of movement and the right flank. At this stage of the drill, the two M3 CFVs are represented in the figure by big blue arrowheads. The small blue arrows fanning out from the blue arrowheads represent turrets orientations
  • As the tank moves across the countour line, successive sections of enemy-held terrain can be scanned with the tank's TIS. The first terrain sections to be visible will be the ones around the "C" label in the figure, then the ones the "B" label
  • If enemy units were located at "A", "B" and "C", the tank would make contact with each, one at a time. Compare this to cresting the hill and making contact with all enemy units simultaneously
  • Once the contour line around the hill changes direction, so does the the direction of movement of the tank. The tank re-orients along new direction of the contour line, stops at the tip of the big blue arrow and waits for the M3 CFVs to occupy new overwatch positions (red arrowheads in the figure)
  • The tank now moves again along the contour line (big red arrow in the figure), scanning the western side of the terrain labelled "B" and eventually the terrain labelled "A"
"Tank Rush", the US Cavalry version. Click the image for an expanded view.

There is catch to this. If contact with the enemy is made the tank will be showing not its front but its left hull side to the enemy. Always keep in mind that the tank's best armor is located in its front. So be ready to quickly pull back into cover when contact is made (see figure below). This will allow you to re-orient behind the cover of the hill and then engage the enemy from a hull-down position.

It's better to be nagged about a damaged gearbox than to be awarded a posthumous Purple Heart. Click the image for an expanded view.

Cheers,

Wednesday, May 6, 2009

Battle Group Commander: Episode One


In a previous entry, I shared the news about a sale at Shrapnel Games.

Thanks to the sale event and the coupon I mentioned in my previous entry, you can get "Battle Group Commander: Episode One" for $12.49.

Sure, this game features only four scenarios. Yet I can assure you will be hooked and get hours of gameplay and tactical goodness out of this game. If you have been in the fence about this line of war games, this a golden opportunity.

Cheers,

Saturday, May 2, 2009

A Tank Platoon in the Defense, Part 2: Tactical Misadventures in Steel Beasts ProPE

Continued from here.

I played this scenario with some gentlemen from a very well-known simulation community. The identities of the players are withheld to protect the innocent. :) All tanks in the platoon manned by humans except for tank #3, which was handled by the computer. I played as commander of tank #2.

Our platoon commander decided to go as the FRAGO suggested: stay in BP1, inflict some damage, call for an arty smoke mission and reverse to the alternate battle positions.

We never got a chance.

The enemy attacked our right flank (yes, the flank I was holding) and overran my position. When we detected the enemy tanks, they were at a shouting distance from my position. The call for artillery-smoke from our commander was too late as the enemy was already near our position. The enemy moved to the back to our position and took my tank, then tank #1. Tank #3 got destroyed while it was trying to reverse towards safety. Tank #4 made an heroic attempt to eliminate the fast moving enemy tanks. He took 2 of them with him.

The mission went catastrophically bad.

Below are my thoughts on why I think we failed.
  • The prepared dug-in firing positions at BP1 had good fields of fire on EA Dog. Good but not optimal.
Click the image for an expanded view. Left: map, showing our initial positions. Right column: birds-eye view from BP1 towards EA Dog. Note the prepared tank positions in front of each tank. Tank #3 and #4 had good overlapping fields of fire, but tanks #1 and 2 were separated by a small elevation covered by a patch of vegetation and they ended up with different views of EA Dog.

A close up of the individual positions of tanks #1 and #2. Note the slight elevation that separates both, which resulted in non-shared fields of fire. Click the image for an expanded view.

  • The withdrawal route from BP1 to BP2A and BP2B had no cover or concealment. We should have realized that if the artillery-delivered smoke would fail its purpose (as it did), the withdrawal towards the alternate BPs would have exposed us to enemy observation and fire.

The arrow indicates my withdrawal route, which featured terrain flat as a pancake. The thing in front of my tank is a prepared dug-in tank fighting position.


A bit off topic, I want to mention that my tank took 8 hits during this mission. The 9th was the charm ...

The red rods indicate the direction of the munition hitting my tank. Click in the image for an expanded view.

Cheers,

Saturday, April 18, 2009

Steel Beasts ProPE v2.46: Pics from the Frontlines

I've been re-playing the so-called "classic scenarios" of Steel Beasts. These are scenarios from the original Steel Beasts and from the first version of Steel Beasts ProPE. These scenarios I played several times before but they don't cease to attract me for a new round. Really great stuff. This scenario in particular features a breach through a minefield and then a continued attack towards a road junction.

The images below are clickeable.


Cheers,

Saturday, April 11, 2009

Steel Beasts ProPE v2.46, Back in the Hatch

I got my Steel Beasts ProPE v2.46 past Wednesday, but it was not until today that I got a chance to install it and take a ride. In a short time, I'm going to post some more detailed impressions about the upgrade. On the meantime, let me tell you that the new Abrams 3D model is a beauty. See clickeable screenies below.

Friday, April 10, 2009

Steel Beasts ProPE v2.46 Upgrade: Second Video by Sean

The second of the two videos showcasing the new stuff in Steel Beasts ProPE v2.46, again courtesy of Sean (forum admin. at the official eSims' forums). Thanks Sean!


Wednesday, April 8, 2009

Steel Beasts ProPE v2.46 Upgrade: Video by Sean

I actually linked you to this video in a previous entry.

Sean (administrator of the Steel Beasts Official forums and author of the video) has been very kind authorizing me to post both of his videos showing the new features in Steel Beasts ProPE v2.46. Thanks million Sean!

Second part is coming in a future entry.

Monday, April 6, 2009

Steel Beasts ProPE v2.46 Upgrade: Shipping Now!

For the charges of not being up to date in following the news on the upcoming upgrade of Steel Beasts ProPE: guilty as charged, your honor ...
Also, guilty as charged on procrastinating my pre-order of the upgrade at a discount price.

This morning I purchased the upgrade and I noticed that the discount rate didn't apply to my purchase. On closer inspection the eSim store has the full upgraded version of Steel Beasts ProPE already listed. I rushed to the official eSim forums and found this post made yesterday by Ssnake, stating:
Well, actually the packing will take most of the weekend. Shipping will start this Monday.
It is very likely the upgrade CD is shipping already for those who pre-ordered.

Cheers,

UPDATE: Tom tells us he received his upgrade copy. See comment below. It's happening. Thanks Tom.

Thursday, March 19, 2009

Steel Beasts ProPE Upcoming Upgrade Featured in Video

Steel Beasts ProPE, the holy grail of modern armored warfare simulations is preparing an upgrade of its current version.

New and exciting features are included in the upgrade.

Please visit this thread at the official eSim forums.

Cheers,

Sunday, March 1, 2009

Target Fixation Never Good: Tactical Misadventures in Steel Beasts ProPE

Did I ever mentioned Steel Bests ProPE, the best modern tank simulation available to the civilian market?

Even when it costs USD$125.00, this is a ride you ought to have if you are interested in modern tank warfare.

Modern tank battles are fast and deadly and this is clearly depicted in the simulated battlefield of Steel Beasts. That feeling of "what the hell got me?" is constant in Steel Beasts.

In my latest battle, a home-made scenario where I was trying to clear a couple of kilometers-wide gap of Iraqi desert, I got owned by a virtual Iraqi tanker because of my fixation on a single target.

The scenario I made pits a hunter-killer team of M3s Cavalry Fighting Vehicles and M1 Abrams tanks. I choose to be in the "hunter" team of M3s and I moved carefully towards contact. In front of my team there were Iraqi BMP2s and tanks. The questions I wanted to explore is how a "hunter" in these fabled "hunter-killer" teams works. How do you drive an M3 towards contact with an armored threat wit superior fire-power? How difficult is to bug-out once contact was made?

Well, didn't get an answer to those questions.

Still, I learned something: target fixation kills.

Things started bad from the beginning. While trying to make contact and keeping a distance at the same time, I lost my wingman to fire from the right flank.
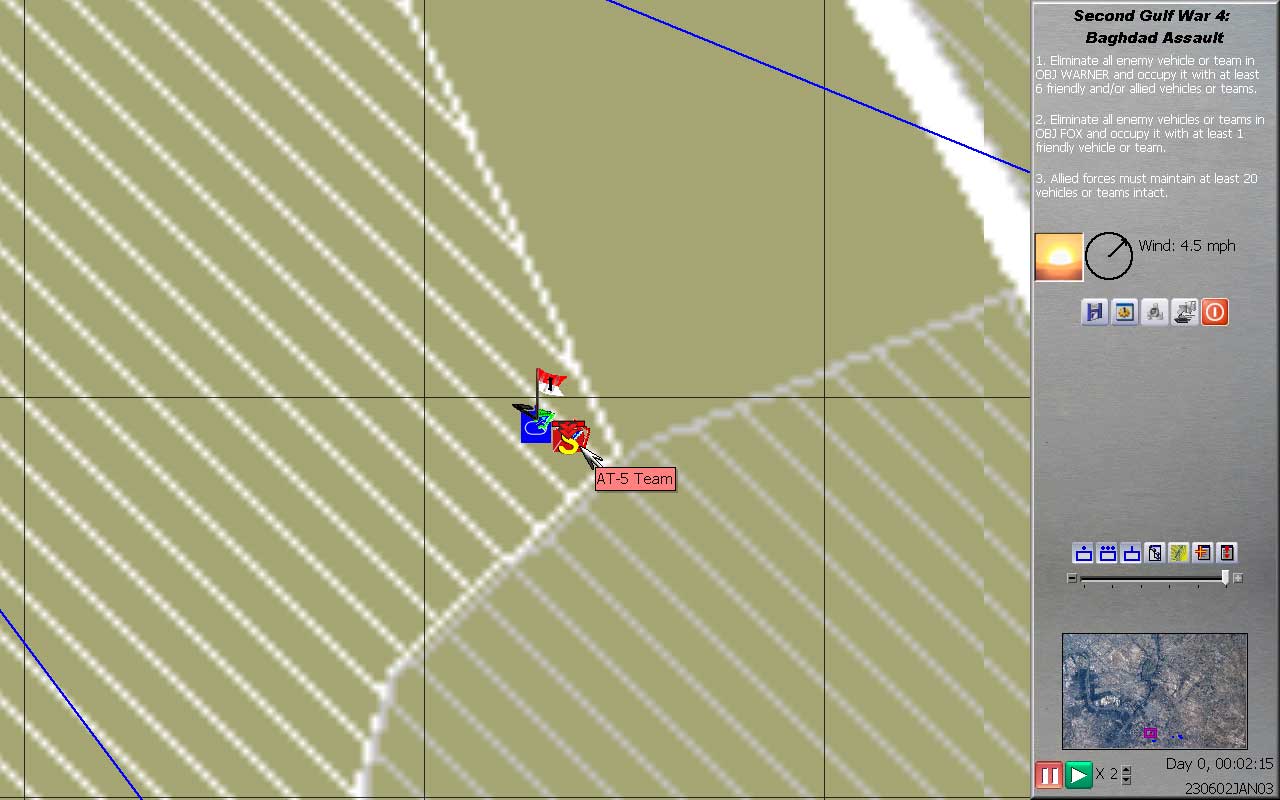
I quickly called the M1s (couple of kilometers behind) to take position and eliminate the threat. The M1s got something: can you see the smoking Iraqi tank in the horizon of the image above?

To my front, I made contact with a couple of BMP2s and I took them out.

But a third BMP was more difficult to take out.
This Iraqi BMP bugged out fast, under a curtain of smoke. This is the instant where I screwed up. In my eagerness to take the fast-maneuvering BMP out and looking for a slightly better angle to shoot, I got owned from my right flank. There was still a threat in my right flank.

Steel Beasts ProPE has this fantastic AAR (after action report) tool that allows you to see a replay of the battle from any angle. It's a wonderful learning tool.

So, this is what happened to me.

The yellow bar in the image bellow is the shell from the Iraqi tank. Can you see the Iraqi tank in the backgroung (the small smoke puff of its main gun)?

Here's what the Iraqi tanker could see from his point of view. Just that little of me showing up above the dunes was enough ...
And a panoramic view of the whole thing.
I'm in the vehicle in the middle, near the bottom. The BMP I was trying to get is throwing somoke and reversing in the top left. The small puff of the Iraqi tank is visible in the extreme right, top corner.

And this is a closer view of the Iraqi tank.

Besides letting my guard down at the flanks, I guess that I failed miserably because I got decisively engaged with my first contacts. I was supposed to spot targets and call the tanks, not taking them myself.

Cheers,